Managing Subscriptions on Your iPad
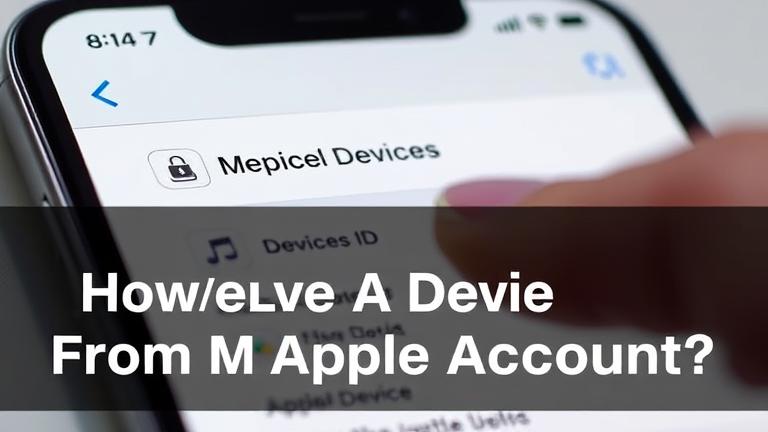
Managing your subscriptions on your iPad is essential for maintaining control over your digital expenses and ensuring an organized app environment. Properly handling subscriptions allows you to avoid unnecessary charges and keep your digital life in order. To begin, unlock your iPad and open the Settings app. At the top of the menu, tap on your Apple ID profile picture or name. Then, select Subscriptions to view a comprehensive list of all your active and expired subscriptions (source: Deletingsolutions).
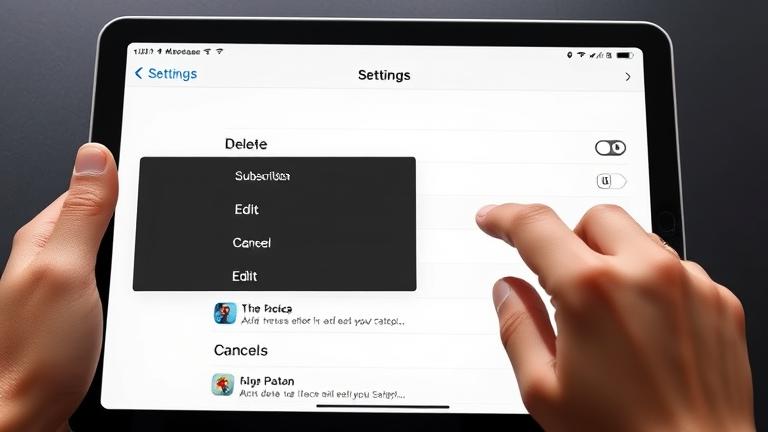
Within the Subscriptions menu, you can review details such as billing dates, costs, and renewal status. If you need to cancel a subscription—perhaps a service you no longer use or a trial you wish to discontinue—you can do so by selecting the specific subscription plan. Tap Cancel Subscription and confirm your decision. It’s recommended to cancel before the renewal date to avoid being charged for the next billing cycle (source: Deletingsolutions).
Regularly reviewing your subscriptions not only helps prevent unnecessary expenses but also aids in maintaining a tidy digital environment. If you want more detailed guidance on managing your Apple subscriptions, visit our comprehensive guide. Keeping track of your subscriptions ensures you only pay for what you truly need and helps manage your digital budget more effectively.
Video Tutorial
Solutions for Common Unsubscription Problems
Encountering difficulties when trying to unsubscribe from services is common, but many of these issues can be resolved with step-by-step guides and troubleshooting tips. For example, if you’re struggling to unsubscribe from platforms like OfferUp, Instagram, or Amazon Seller Central, specific instructions are available to help navigate through the process. Typically, these services require you to deactivate or delete your account through their website or app, often found under sections labeled Account Settings or Privacy (source: Deletingsolutions).
Clearing your browser cookies or app data after completing the unsubscription can prevent residual notifications and access issues. If issues persist, contacting customer support via email or live chat often provides a quick resolution. For example, detailed guides on how to cancel Hotspot Shield or disable OfferUp are available for users facing specific problems:
Following the platform-specific procedures carefully—such as logging into your account, locating the Subscription or Deactivate section, and confirming the cancellation—ensures a smooth unsubscription process (source: Deletingsolutions). Using official help centers or support channels can clarify any uncertainties and help finalize the cancellation securely.
Steps to Confidently Cancel Subscriptions on Your iPad
To cancel unwanted subscriptions directly through your iPad, follow these detailed steps:
- Open the Settings app on your iPad.
- Tap on your Apple ID name at the top of the screen.
- Select Subscriptions from the list.
- Browse your active subscriptions and tap on the one you want to cancel.
- Tap Cancel Subscription at the bottom of the subscription details page.
- Confirm the cancellation when prompted to finalize the process.
If you cannot see the subscription listed, it may be managed through a different account or service, so double-check the relevant app or website. For additional guidance, see this detailed tutorial on managing subscriptions on Apple devices (source: Deletingsolutions).
Tips for Organizing and Monitoring Your Subscriptions
Staying organized with your subscriptions can save you a significant amount of money over time. Here are some expert tips:
- Regular review: Periodically check all active subscriptions. Use spreadsheets or dedicated apps like Truebill or Bobby to keep track. This practice helps identify unused or redundant services (source: Deletingsolutions).
- Cancel unnecessary subscriptions: Visit each platform to deactivate or delete subscriptions you no longer need. Always look for confirmation emails or notifications confirming the cancellation to ensure the process was successful.
- Set billing reminders: Use calendar alerts or app notifications to remind yourself a few days before renewal dates. This proactive approach allows you to cancel or reassess if you no longer want a service (source: Deletingsolutions).
- Use controlled payment methods: Some banks offer virtual or single-use credit card numbers for subscriptions. This reduces the risk of continued charges from forgotten or abandoned subscriptions.
- Monitor financial statements: Regularly review your bank and credit card statements to catch any unexpected charges early. Disputing unauthorized charges promptly can save you money and hassle.
Implementing these practices increases transparency over your digital expenses and helps prevent surprise billing. For detailed steps on removing payment methods or cancelling subscriptions, check out our resources linked above (sources: Deletingsolutions and Deletingsolutions).
Sources
- Deletingsolutions – How Do I Delete My Apple ID from My Android?
- Deletingsolutions – How Do I Remove a Payment Method From Facebook on My iPhone?
- Deletingsolutions – How to Cancel Hotspot Shield on iPhone
- Deletingsolutions – How Do I Disable OfferUp?
- Deletingsolutions – How to Delete Subscriptions on iPad
- Deletingsolutions – How Do I Delete My Apple Watch Account?
- Deletingsolutions – How to Cancel Your iTunes Subscription